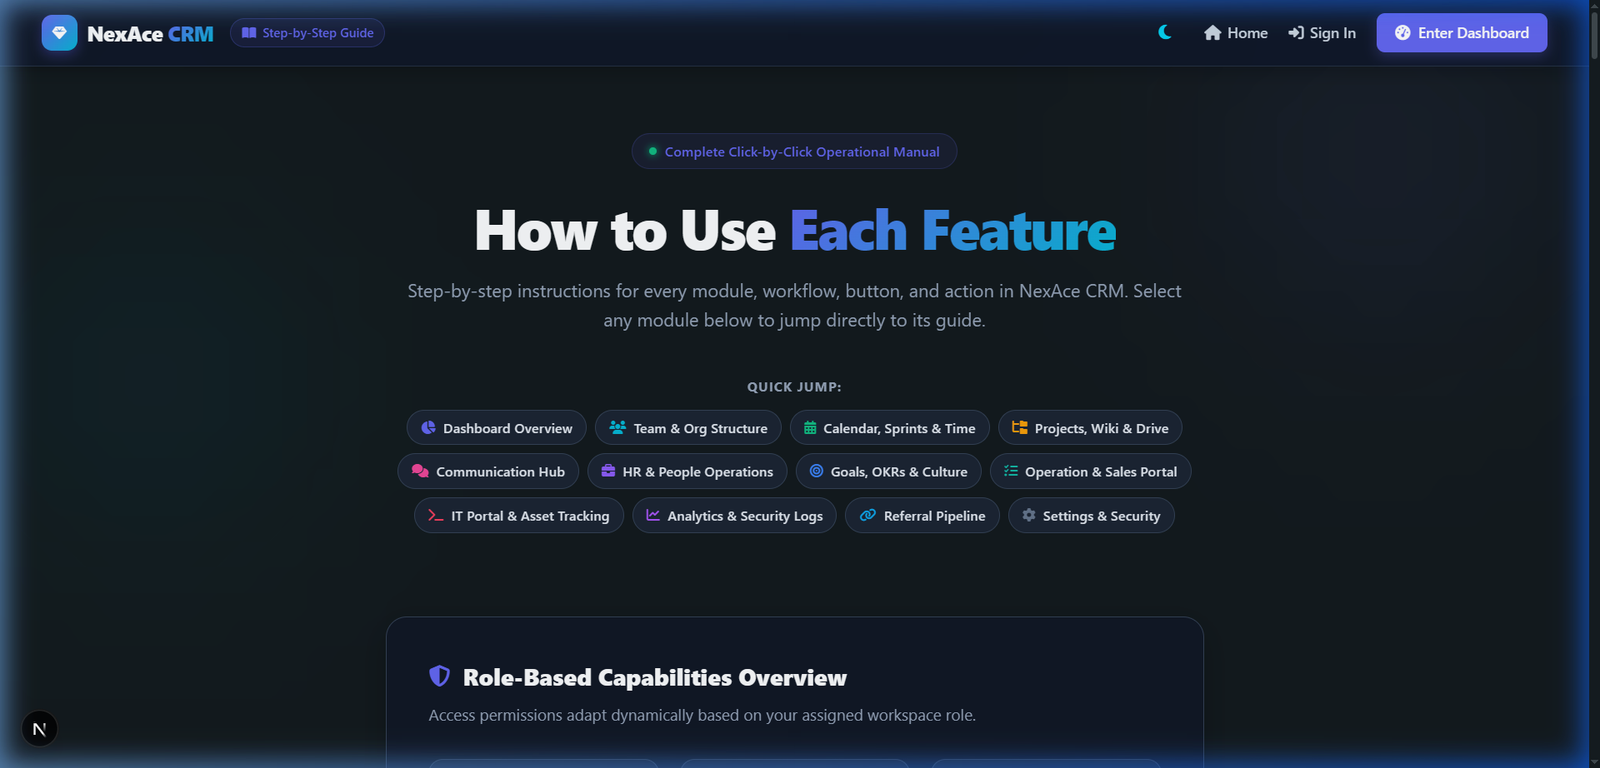
Step-by-step operational workflows, button-by-button actions, and live UI screenshots for every tool and module in NexAce CRM.
16Modules
50+Features
5User Roles
∞Workspaces
View for Role:
Getting Started
New to NexAce CRM?
Follow these 4 steps to get your team fully operational in under 10 minutes.
01
Register Your Workspace
Create your isolated company workspace with your company name, admin email, and a secure password.
Go to Register
02
Add Your Team
Onboard employees individually or bulk-import entire departments with roles & reporting lines.
View Team Module
03
Set Roles & Permissions
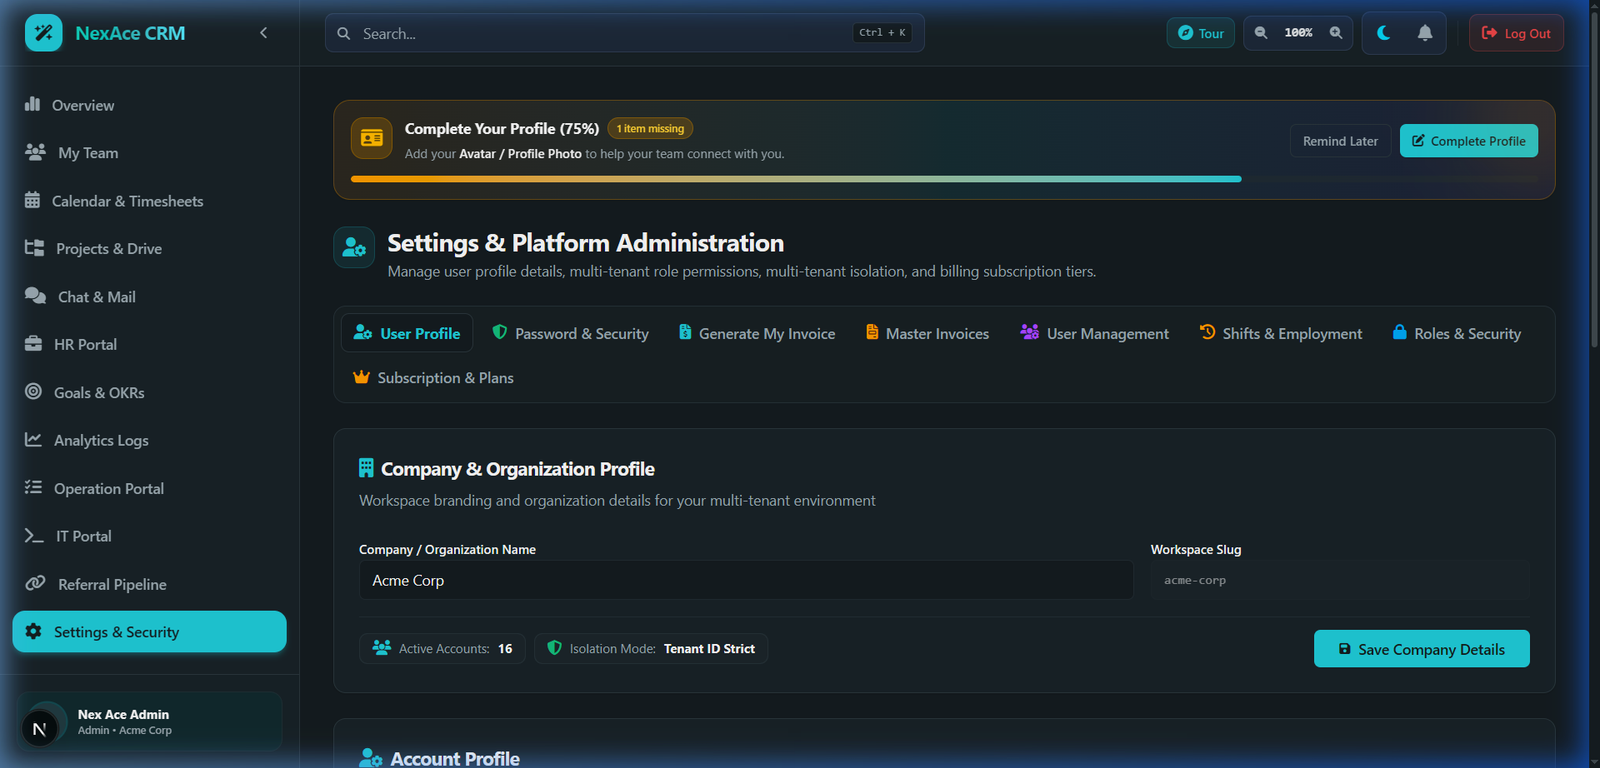
Configure the granular role-based permission matrix so each role only sees what they need.
View Settings
04
Launch Your First Project
Create a Kanban project, assign tasks to your team, and link them to an agile sprint.
View Projects
Role-Based Capabilities Overview
Access permissions and dashboards adapt dynamically based on your assigned workspace role.
Admin
16 Modules
Unrestricted workspace control, user invitations, role permission matrix, SaaS billing, and security audit logs.
Explore Admin View
Sub Admin / OPS
16 Modules
Client project delivery, sales pipeline deals, resource staffing bench, IT asset inventory, and shift oversight.
Explore Sub Admin / OPS View
Manager
16 Modules
Timesheet review & sign-offs, sprint progress tracking, 1:1 check-in meeting agendas, and team appraisals.
Explore Manager View
HR
12 Modules
Onboarding & exit checklists, leave approvals, document vaulting, help desk ticketing, and company pulse surveys.
Explore HR View
Employee
10 Modules
Daily clock-in/out work timer, task execution, weekly timesheet logging, peer kudos, and candidate referrals.
Explore Employee View
Visual Walkthroughs & Action Items
Click-by-Click Instructions
Showing 16 of 16 modules. Follow the illustrated screenshots and exact instructions.
01Central Command/dashboard ~1 min read
Dashboard Overview
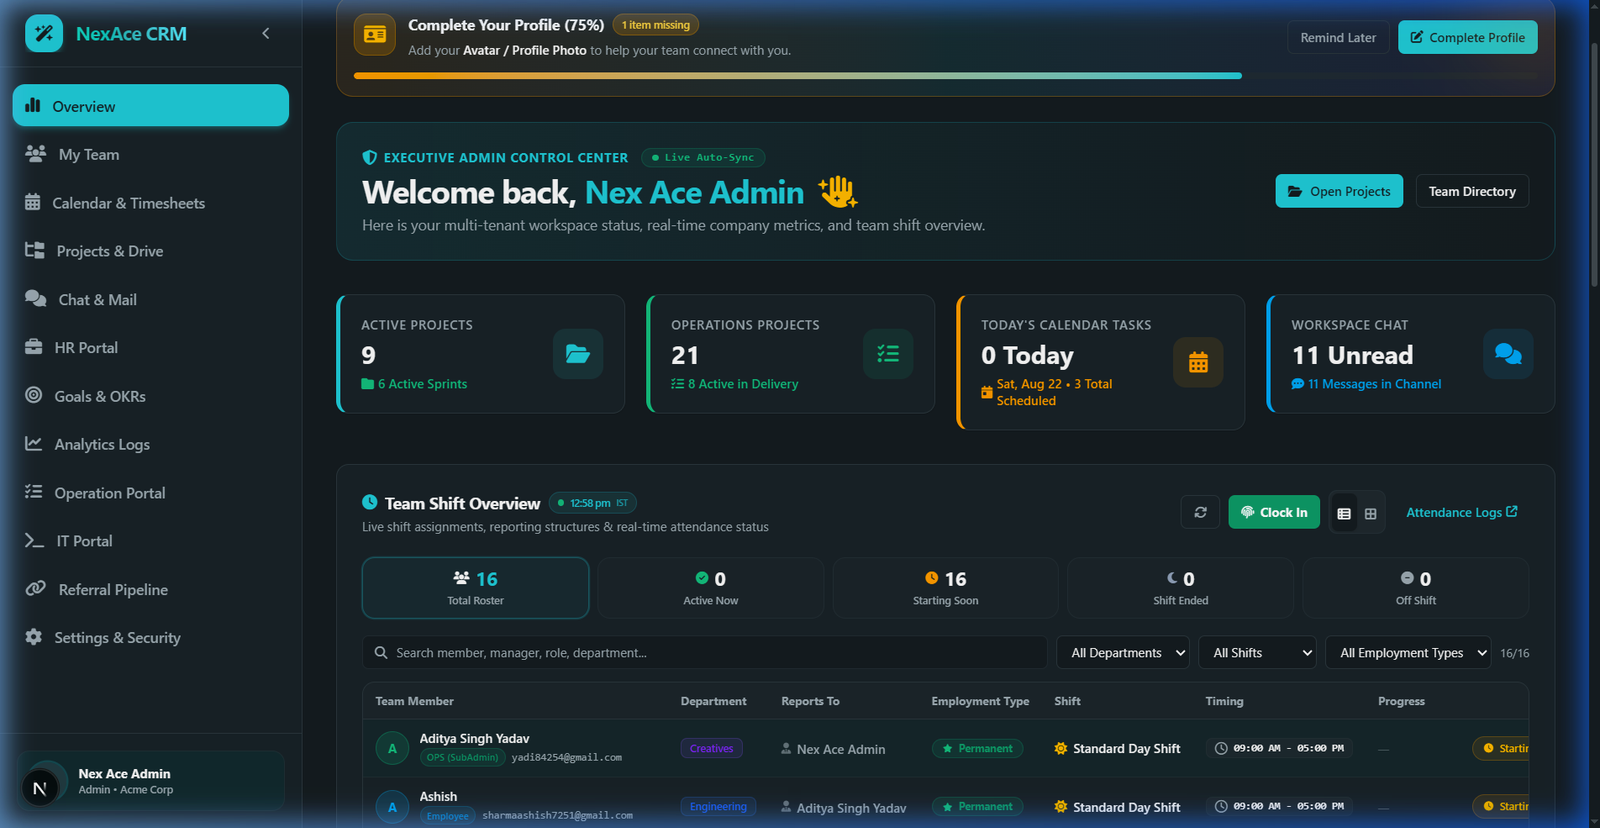
Personalized command center with live status metrics, quick actions, shift schedule, and instant check-in/out timer.
Check-in Mode:Geo-aware IST
Approval Sync:Real-time
Notification Delay:< 1s
localhost:3000/dashboard
Live Clock-In Widget, Pending Approvals Counter, and Shift Schedule Overview
1
How to Clock In & Out Daily (Attendance Tracker)
Accurately log your working hours, breaks, and shift attendance in real time.
Locate the Attendance Widget in the top-left section of the dashboard.
Click the green 'Check In' button when your workday begins. The digital live timer immediately starts counting hours:minutes:seconds (00:00:00) in IST.
Taking a Break: When taking lunch or a break, click the amber 'Take Break' button. The timer pauses and marks your break status.
Resume Work: Click 'Resume Work' upon returning. The timer resumes active duration tracking.
Ending Workday: At shift completion, click the red 'Check Out' button. The exact login time, logout time, break duration, and net hours are committed to the database.
Pro Tip: Pausing your shift for lunch ensures billable and shift compliance records remain 100% accurate for payroll.
2
How to Review KPI Cards and Pending Approvals
Quickly identify pending approvals and items requiring immediate attention.
Check the top summary cards: Active Projects, Pending Timesheets/Leave Approvals, and Unread Messages.
Click directly on any metric card to jump straight into the corresponding module with pre-filtered items.
3
How to Read & Acknowledge Pinned Announcements
Stay updated on critical company-wide updates, policy releases, and urgent broadcasts.
Scroll to the Announcements widget on the right side of the dashboard.
Urgent alerts and executive memos appear pinned at the top. Click on any announcement title to expand the full memo drawer.
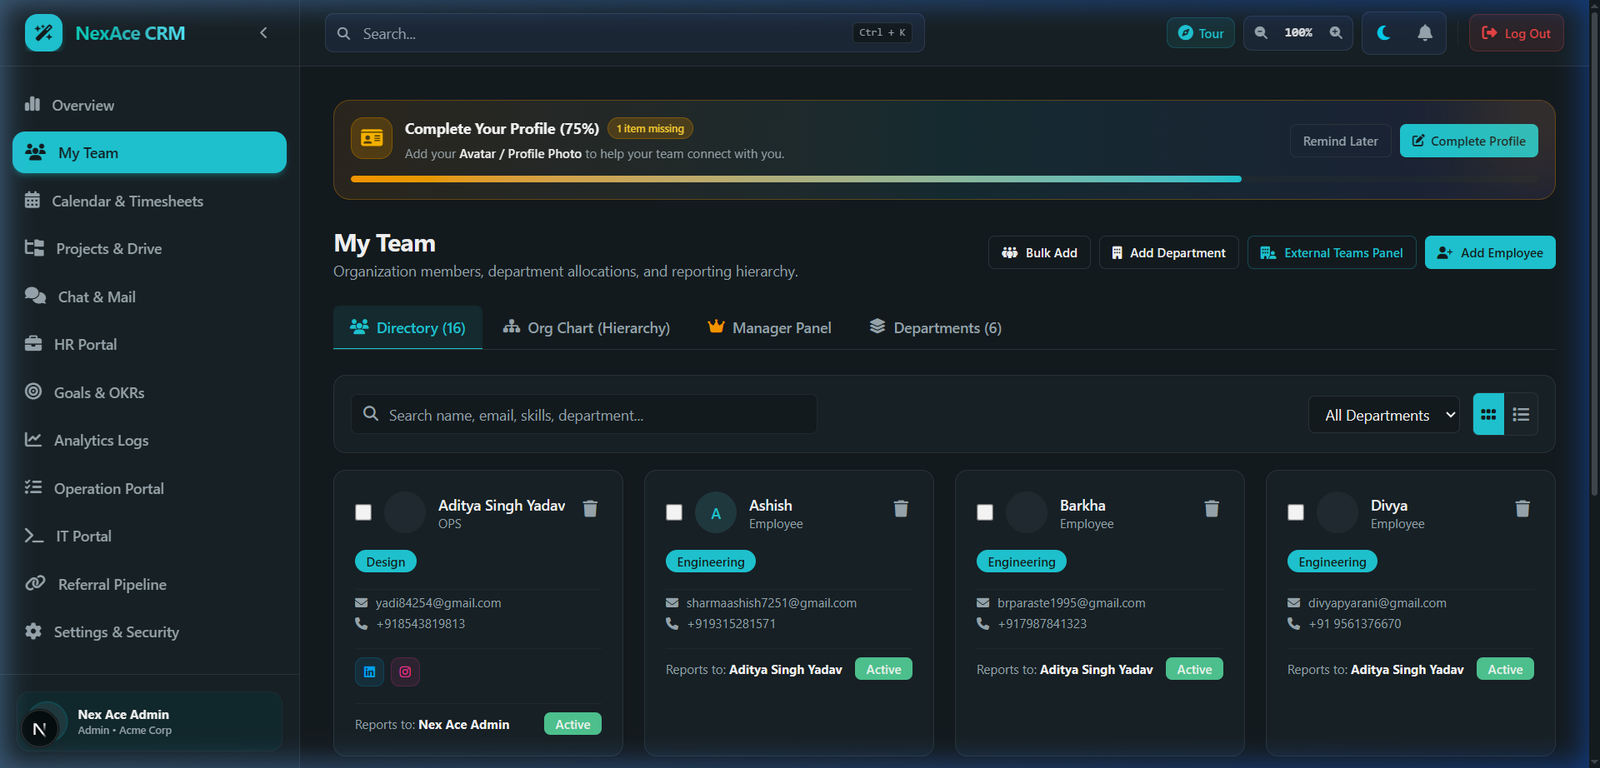
Team Directory Grid with Search, Department Filter, and Quick Profile Inspection
1
How to Search, Filter & Switch Views
Quickly locate team members and inspect their profiles across departments.
Navigate to /dashboard/team and click the 'Team Directory' tab.
Type in the search bar to instantly find colleagues by name, email, or skill keywords.
Use the Department Filter dropdown to filter by Engineering, Marketing, Operations, Sales, or HR.
In the top right, click the Grid Icon for visual cards or the List Icon for a compact data table.
2
How to Add a Single Employee
Onboard a new team member and generate their temporary login credentials.
In the top right of the Team page, click '+ Add Employee'.
Fill out the modal fields: Full Name, Work Email, Role (Employee, Manager, HR, OPS, Admin), Department, Reporting Manager, and comma-separated Skill tags (e.g. React, TypeScript, Node.js).
Click 'Create Employee'.
A dialog displays the new profile and an auto-generated temporary password. Click 'Copy Credentials' to share with the new hire.
Pro Tip: Employees are automatically prompted to set a secure personal password on their first login.
3
How to Bulk Import Multiple Team Members
Provision entire departments or batch invite staff in a single operation.
Click the 'Bulk Add' button on the Team page.
In the spreadsheet-style modal, fill out the rows: Name, Email, Role, Department, and Manager. Click '+ Add Another Row' if needed.
Click 'Submit Bulk Employees' to create all accounts in a single transaction.
4
How to Use the Interactive Visual Org Chart
Visualize company reporting structures and reassign managers seamlessly.
Mouse Drag / Scroll Wheel
Switch to the 'Org Chart' tab to view the live hierarchy tree.
Click and drag across the canvas to pan; use the '+' and '-' controls or mouse scroll wheel to zoom.
Click any employee card node to view their contact details, direct reports count, and assigned department.
Admins and OPS leads can click and drag an employee card and drop it onto a new manager card to reassign reporting hierarchy.
5
How to Create & Manage Departments
Organize teams into structured operational units with dedicated department heads.
Click the 'Departments' tab and select '+ Add Department'.
Enter Department Name (e.g. 'Quality Assurance') — the system auto-generates the standardized code (e.g. 'QA').
Select the Department Head / Manager and click 'Save Department'.
Click 'View Members' on any department card to inspect all assigned personnel.
03Time & Agile Sprints/dashboard/calendar ~2 min read
Calendar, Sprints & Attendance
Unified company calendar, sprint tracking, weekly billable timesheets, and attendance audit logs.
Categories:5 Event Types
Timesheet Cycle:Weekly
Audit Export:CSV & JSON
localhost:3000/dashboard/calendar
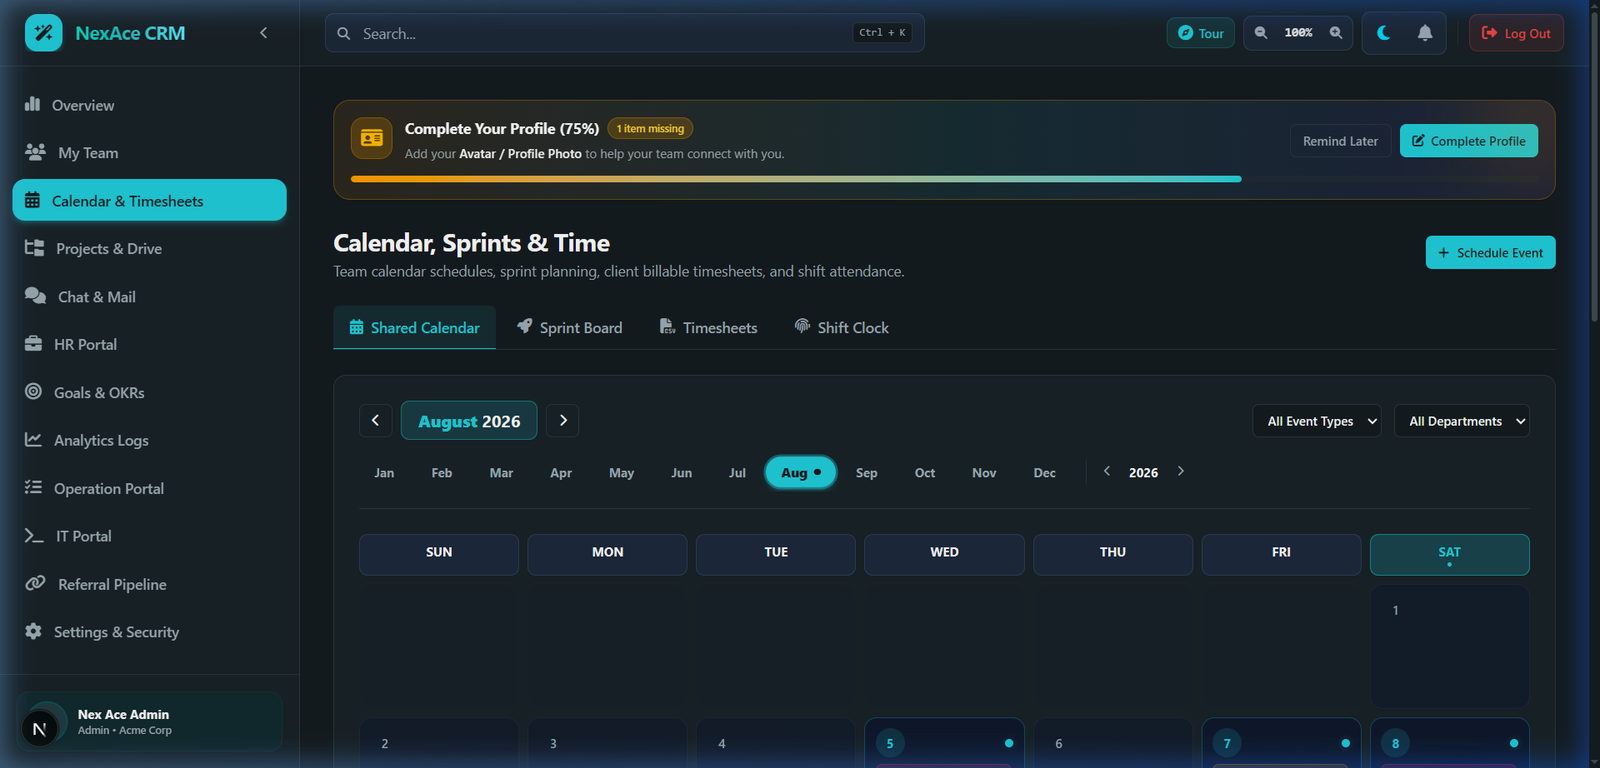
Unified Team Calendar with Multi-Category Events, Sprints, and Timesheets
1
How to Schedule Team Calendar Events
Coordinate meetings, deadlines, holidays, and milestones with department filtering.
Go to /dashboard/calendar and click the 'Calendar' tab.
Click '+ New Event' (or click directly on any calendar cell date).
Fill in: Event Title (e.g. 'Q3 Roadmap Planning'), Event Type (Meeting, Holiday, Birthday, Deadline, Personal), Department visibility, Start/End timestamps, and description.
Click 'Create Event'. The event appears color-coded across all invited department calendars.
2
How to Create & Monitor Agile Sprints
Run structured sprint iterations and track completion progress.
Switch to the 'Sprints' tab and click '+ New Sprint'.
Enter Sprint Name (e.g. 'Sprint 24 - Checkout Revamp'), Sprint Goal, Start Date, and End Date, then click 'Start Sprint'.
Link tasks to this sprint from the Project board to watch the burndown percentage and task completion rate update live.
3
How to Fill Out & Submit Weekly Timesheets
Log daily project effort and distinguish billable vs. non-billable client hours.
Click the 'Timesheets' tab and select the work week using navigation arrows (< Prev Week / Next Week >).
Click '+ Add Task Row', select your project, and type the task description.
Enter hours worked for each day (Mon, Tue, Wed, Thu, Fri, Sat, Sun).
Check the 'Billable' checkbox if hours should be billed to a client retainer.
Click 'Save Draft' to persist or 'Submit for Approval' to route to your manager.
Pro Tip: Marking billable hours accurately allows the CRM to compute client retainer burn rates automatically.
4
How Managers Approve Timesheets & Admins Export CSV
Review team submissions and download comprehensive attendance audit sheets.
Managers scroll to 'Pending Team Submissions' and click 'Approve' to lock the timesheet or 'Reject' with feedback.
Admins click 'Attendance', set a Date Range under 'Admin Hours Summary', and click 'Export CSV' for full payroll audits.
07Clients & Pipelines/dashboard/clients ~2 min read
OPS Portal & Retainers
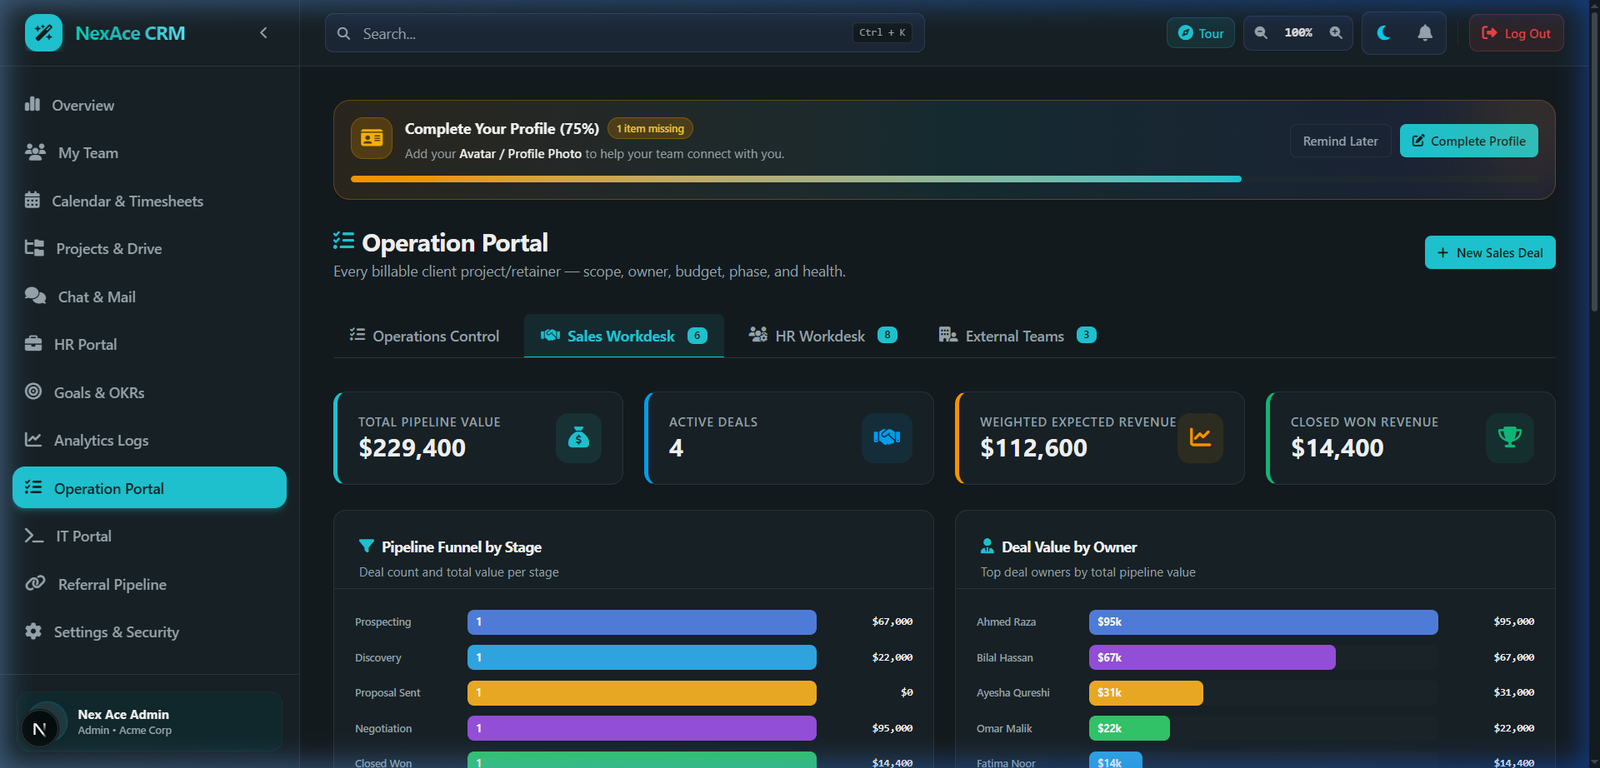
Client delivery accounts, sales deals pipeline, batch data importer, staffing utilization grid, reports & data exports, and external contractor directory.
Health Indicators:Green / Amber / Red
Deal Stages:6 Stage Pipeline
Bulk Importer:CSV & Paste
localhost:3000/dashboard/clients
Sales Deal Pipeline Workbench with Deal Value Probability and Close Dates
1
How to Bulk Import Data (CSV, JSON & Copy-Paste)
Batch import dozens of client retainers and sales pipeline deals simultaneously.
In the top right of the OPS Portal, click the 'Bulk Import' button.
Select the Entity Type: 'Client Retainers & Projects' or 'Sales Pipeline Deals'.
Choose your input method: Drag and drop a `.csv`, `.tsv`, `.txt`, or `.json` file, or click 'Paste Spreadsheet Data' to paste directly from Excel or Google Sheets.
Click 'Download Template' if you need a formatted sample template.
Review the live Summary Chips (Total Records, Total Value $, Unique Clients) and inspect rows in the interactive preview table.
Click 'Execute Import' to batch persist all records directly to your database.
Pro Tip: You can delete unwanted rows or filter records within the preview table prior to running the import.
2
How to Track Client Accounts & Retainer Health
Monitor retainer hour burn rates, delivery health flags, and client communication histories.
In the 'Operations' tab, click '+ New Client Project', input Client Name, Project Name, Delivery Lead, Billing Type (e.g. 'Monthly Retainer'), and Budget Hours.
Set Delivery Health: Green (On track, healthy burn rate), Amber (Approaching retainer ceiling), or Red (Over budget or critical blocker).
Open any client account to log contact history entries (Calls, Emails, Meetings).
3
How to Manage the Sales Deal Pipeline
Track sales opportunities across stages with deal valuations and probability weighting.
In the 'Sales' tab, toggle between Kanban Board and Table View.
Click '+ New Deal', enter Client Account, Deal Title, Deal Value ($/₹), Probability (%), Expected Close Date, and Deal Owner.
Drag deal cards across stages: Prospecting -> Discovery -> Proposal Sent -> Negotiation -> Closed Won / Closed Lost.
4
How to Manage Staff Resource Allocation & Bench
Optimize workforce utilization and prevent employee burnout.
In 'HR Allocations', review staff deployment: Deployed (Fully booked), Partially Allocated (Available for tasks), Bench (Ready for new deployments), or On Leave.
Click 'Edit Allocation' to adjust weekly allocated hours.
5
How to Track External Contractors & Freelancers
Manage third-party vendor relationships, contracts, and hourly spend.
In 'External Teams', click '+ Add Contractor', enter Name, Agency, Service Category, Assigned Project, Hourly Rate, and Currency (USD/INR).
012Performance & Culture/dashboard/goals ~2 min read
Goals, OKRs & Culture
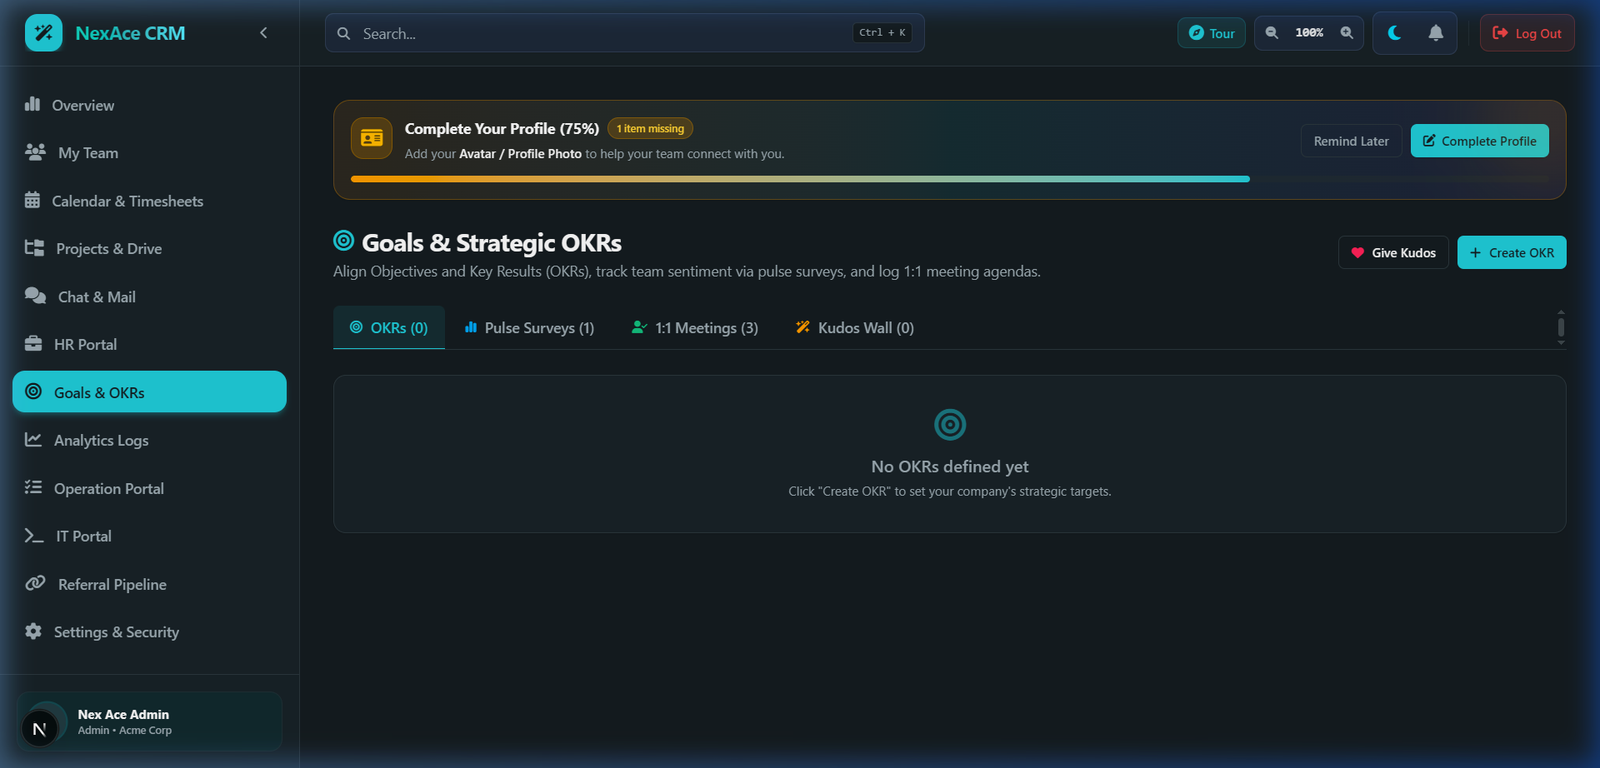
Align company strategy with measurable OKRs, social Kudos wall, pulse surveys, and structured 1:1 meetings.
OKR Tiers:4 Hierarchy Levels
Surveys:Anonymous Sentiment
1:1 Meetings:Rollover Actions
localhost:3000/dashboard/goals
Company to Individual OKR Tracker with Numeric Progress Sliders and Peer Kudos
1
How to Create & Update OKRs
Set and measure strategic targets with numeric progress indicators.
Go to /dashboard/goals > 'OKRs' and click '+ New OKR'.
Set Objective Title (e.g. 'Scale Infrastructure for 100k Users'), Level (Company, Department, Team, Individual), Deadline, and add measurable Key Results (Target Value, Current Value, Unit). Click 'Save OKR'.
Updating Progress: Click on an existing OKR, drag the current value slider for any Key Result, and the status updates automatically (On Track, At Risk, Behind, Completed).
2
How to Post Kudos on the Recognition Wall
Celebrate peer contributions and promote core company values.
In the 'Kudos' tab, click 'Give Kudos'.
Select the colleague you want to appreciate, tag a matching Company Value (Innovation, Speed, Customer First, Teamwork), write your message, and click 'Post Kudos'.
3
How to Submit Weekly Anonymous Pulse Surveys
Provide anonymous feedback on morale, support, and company culture.
In the 'Surveys' tab, answer the weekly check-in question by clicking 1 to 5 stars.
Enter optional anonymous feedback and click 'Submit Response'. Executive leadership views aggregate score trend charts without exposing individual identities.
4
How to Conduct 1:1 Check-In Meetings
Structured manager-employee recurring check-ins with carryover action items.
In the '1:1 Meetings' tab, click '+ Schedule 1:1', pick your manager/report, set the date/time, and define the shared agenda.
During the meeting, record meeting minutes in the notes box and add Action Items. Unchecked action items automatically roll over into your next scheduled 1:1 meeting.
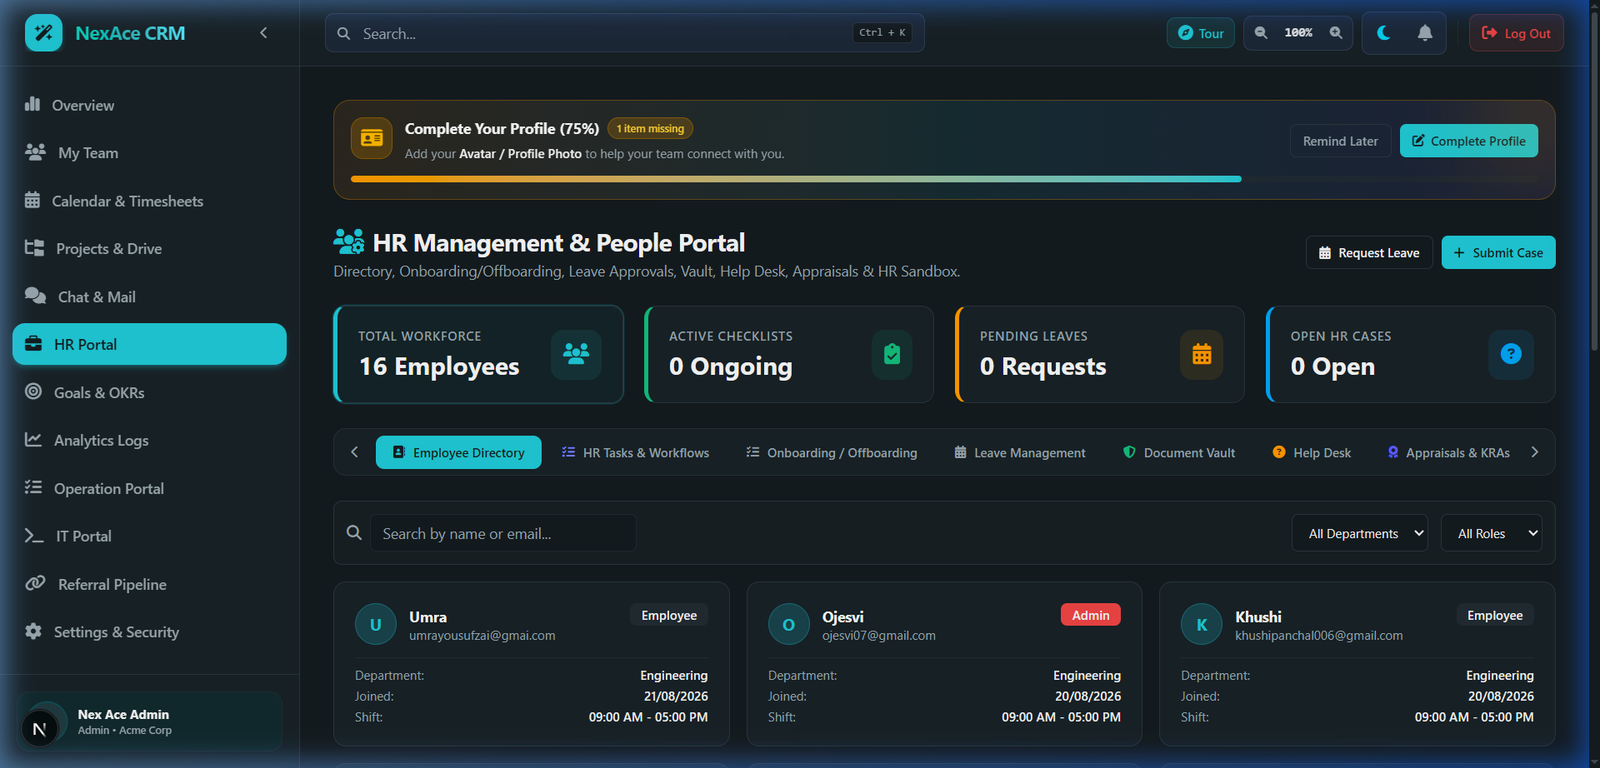
End-to-end human resource management: leaves, onboarding/offboarding, vault, help desk, appraisals, and probation.
Leave Types:Casual, Sick, Paid
Vault Security:Restricted Access
Reviews:KRA & Probation
localhost:3000/dashboard/hr
HR Portal with Checklists, Leaves, Document Vault, Help Desk, and Appraisal Cycles
1
How to Apply for Leaves & Export Leave Records
Submit time-off requests, manage approval queues, and download leave reports.
Go to /dashboard/hr > 'Leaves' and click '+ Apply for Leave'.
Select Leave Type (Casual, Sick, Paid, Unpaid), pick Start Date and End Date, enter your reason, and click 'Submit Request'.
Manager/HR Approval: Supervisors click 'Approve' or 'Reject' on pending requests.
Export Single Leave: Click the Export button on any record to download as CSV, JSON, or formatted Text Report.
Export All Leaves: Click 'Export All (CSV)' to download full company leave history.
2
How to Manage Onboarding & Offboarding Checklists
Ensure new hires and departing staff complete required compliance and asset steps.
In the 'Checklists' tab, click '+ Assign Checklist', select employee, and choose Onboarding or Offboarding.
Check off milestones as completed (e.g. NDA Signed, Laptop Dispatched, Slack Invited, Asset Return). The progress bar tracks completion percentage in real time.
3
How to Store Confidential Files in Document Vault
Securely store sensitive personnel documents with restricted visibility.
In the 'Vault' tab, click '+ Upload Document'.
Input Title (e.g. 'Offer Letter - Alex Vance'), Category (Offer Letter, NDA, KPI Agreement, ID Proof), and upload the file.
Select the Target Employee and toggle Restricted Access (restricts visibility to only the employee and HR/Admins). Click 'Save to Vault'.
4
How to File & Resolve Help Desk Tickets (HR Cases)
Internal employee ticketing system for payroll inquiries, IT requests, and workplace support.
In the 'Cases' tab, click '+ New Ticket', pick Category (Payroll, IT Support, Workplace, Benefits), select Priority (Low, Medium, High, Urgent), type Subject and Details, and submit.
HR Resolution: HR staff click on open tickets to add threaded internal comments, assign ticket owners, and mark status as In Progress or Resolved.
5
How to Conduct Appraisals & Track Probation Reviews
Performance appraisal cycles tied to Key Result Areas (KRAs) and probation alerts.
In the 'Appraisals' tab, select the review cycle and pick an employee.
Score Key Result Areas (KRAs) and competency metrics on a 1–5 scale. Add manager feedback and submit.
In the 'Probation' tab, review automated alerts for employees approaching their 30, 60, or 90-day probation checkpoints.
015Intelligence & Auditing/dashboard/analytics ~1 min read
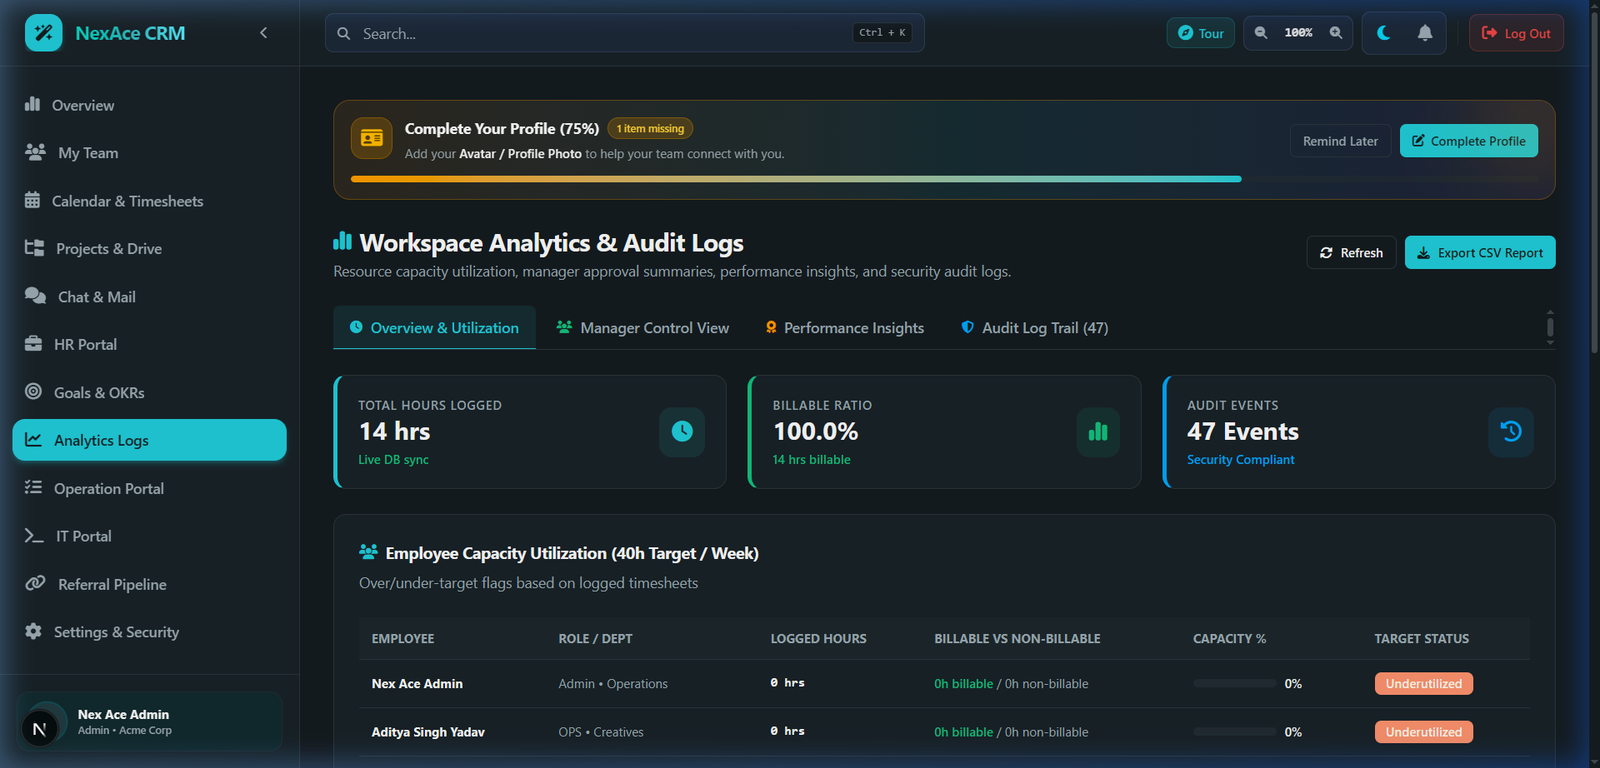
Analytics & Security Audit Logs
Billability ratios, manager productivity dashboards, and enterprise-grade audit trail.
Metrics:Billable % & Effort
Audit Verbs:CREATE, UPDATE, DELETE
Retention:Workspace History
localhost:3000/dashboard/analytics
Executive Analytics Overview: Total Logged Hours, Billable Ratio, and Project Breakdown
1
How to Analyze Billable vs. Non-Billable Effort
Examine workforce productivity and project profit margins.
In the 'Overview' tab, inspect the Billable Ratio Meter and Project Hours Distribution Bar Chart to evaluate profit margins.
2
How to View Manager & Department Insights
Check timesheet submission compliance rates and average hours logged across departments.
In the 'Manager' tab, check team-by-team timesheet submission compliance rates and average hours logged.
3
How to Filter & Audit System Activity Logs
Conduct security and compliance audits across all workspace changes.
In the 'Audit Trail' tab, type keywords into the search box to locate specific events.
Filter by Action Type (Role changes, user creation, leave approvals, document updates, invoice generations), Verb (CREATE, UPDATE, DELETE), Timeframe (Today, Last 7 Days, Last 30 Days), or target User.